This guide explains how to update product stock in bulk using CSV spreadsheets, allowing sellers to efficiently adjust inventory levels for multiple products at once.
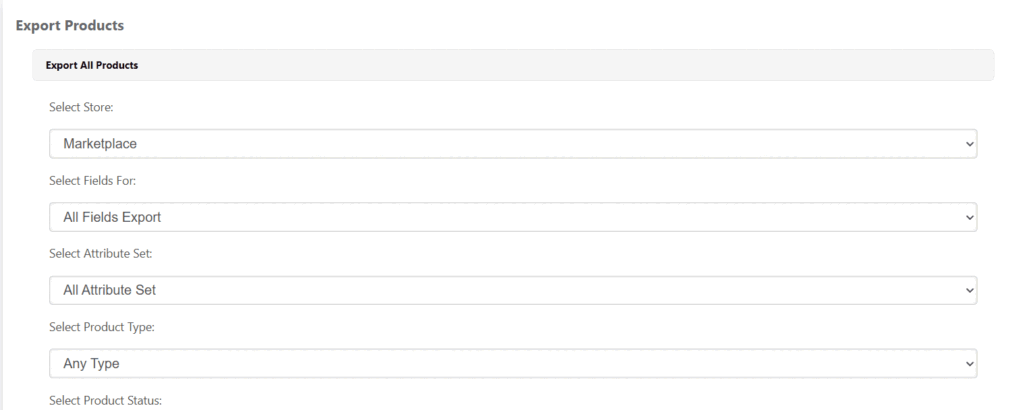
1. Exporting the Product Spreadsheet #
- Access the left-side menu in your seller panel.
- Click on Import / Export Products, then select Export.
- Choose the option to export all products you have selected for sale.
- The system will generate a spreadsheet in CSV format.
💡 Tip: We recommend reviewing the documentation on how to properly open CSV files in Excel to avoid formatting issues.

2. Editing the Spreadsheet #
- Open the CSV file in a spreadsheet editor, such as Microsoft Excel.
- Locate the Quantity column, which indicates the current stock of each product.
- Update the quantity values as needed (for example, change 10 to 200).
- Save the file again in CSV format, ensuring the column separator is a semicolon ( ; ).
3. Checking the Spreadsheet Format #
To confirm that the columns are correctly separated:
- Open the CSV file in a text editor (e.g., Notepad).
- Verify that the fields are separated by semicolons ( ; ).
If the separator is incorrect:
- On Windows, go to Control Panel.
- Select Region > Additional Settings.
- Change the List Separator to a semicolon ( ; ).
- Save the changes, reopen the spreadsheet, and confirm the adjustment.
4. Importing the Updated Spreadsheet #
- Go back to Import / Export Products in your panel.
- Click the Import tab.
- Read the import rules carefully:
- The file must be in CSV format.
- The columns must be separated by semicolons ( ; ).
- Click Browse, select your updated file, and then click Upload File.
5. Validating the Import #
- After uploading the file, click Validate and Import File Data.
- The system will display a preview of all products to be updated.
- Click Validate and Import File Data again to confirm.
During validation, the system will highlight the results:
- Green lines: Products successfully updated.
- Red lines: Errors occurred during the update.
You can use the filters to quickly identify which products were successfully updated and which ones encountered issues.
6. Confirming the Stock Update #
- Access Manage Products in your seller panel.
- Check if the stock values now reflect the quantities you updated in the spreadsheet.
By following these steps, you ensure a fast and error-free bulk stock update process.
Need Help? #
If you have any questions or encounter any issues, feel free to contact our Support Team. We’re always available to assist you!